こんにちは。三竹です。
ご無沙汰してます。
ここ最近、ストレス解消と品質向上は継続的インテグレーションでしょ、と思い立ち、
CI(continuous integration)環境を構築を目指し色々とトライしてみたので、その経過を残していきたいと思います。
目的地は、CakePHPにて、デプロイ → テスト/インスペクションの実施 → 結果の通知、レポート という流れを自動化することです。
今回は環境を構築する所までの説明になります。次回以降は、タスクを実際に登録し、デプロイ等の実施を自動化していきたいと思っています。
さて、今回の環境は以下の通りです。全て1台にインストールしています。
CentOS 6.3
java-1.6.0
Apache 2.2.15
git 1.7.1
Jenkins 1.518
PHP 5.3.3/CakePHP 2.3.6
Apache/PHP/javaはほかのサイトに譲るとして、gitとJenkinsのインストールを説明します。
はずはgitのインストールから。
yum install git git-daemon
xinetdで起動とするので、作成された/etc/xinetd.d/git のdisable=noに変更します。
# default: off
# description: The git damon allows git repositories to be exported using \
#       the git:// protocol.
service git
{
      disable         = no
      socket_type     = stream
      port            = 9418
      wait            = no
      user            = nobody
      server          = /usr/libexec/git-core/git-daemon
      server_args     = --base-path=/var/lib/git --export-all --user-path    =public_git --syslog --inetd --verbose
      log_on_failure  += USERID
}
変更後に再起動して、設定を反映。
# /etc/rc.d/init.d/xinetd restart
こちらでgitのインストール/起動設定が終了です。
では、そのgitへの接続確認をします。まずは、接続元になるリポジトリ—の作成します。
# mkdir public/sample.git
# cd public/sample.git
# git --bare init --shared
リポジトリが作成されました。ディレクトリーは以下のようになっていると思います。
# ls -al
drwxrwsr-x 7 root root 4096 Jun 27 15:34 .
drwxr-xr-x 3 root root 4096 Jun 27 15:33 ..
drwxrwsr-x 2 root root 4096 Jun 27 15:34 branches
-rw-rw-r-- 1 root root  126 Jun 27 15:34 config
-rw-rw-r-- 1 root root   73 Jun 27 15:34 description
-rw-rw-r-- 1 root root   23 Jun 27 15:34 HEAD
drwxrwsr-x 2 root root 4096 Jun 27 15:34 hooks
drwxrwsr-x 2 root root 4096 Jun 27 15:34 info
drwxrwsr-x 4 root root 4096 Jun 27 15:34 objects
drwxrwsr-x 4 root root 4096 Jun 27 15:34 refs
その後、ユーザ作成とディレクトリの権限変更を行います。
# useradd git
# chown -R root:git .
変更後は以下のようになっていると思います。
# ls -al
drwxrwsr-x 2 root git 4096 Jun 27 15:34 branches
-rw-rw-r-- 1 root git  126 Jun 27 15:34 config
-rw-rw-r-- 1 root git   73 Jun 27 15:34 description
-rw-rw-r-- 1 root git   23 Jun 27 15:34 HEAD
drwxrwsr-x 2 root git 4096 Jun 27 15:34 hooks
drwxrwsr-x 2 root git 4096 Jun 27 15:34 info
drwxrwsr-x 4 root git 4096 Jun 27 15:34 objects
drwxrwsr-x 4 root git 4096 Jun 27 15:34 refs
何も入ってないリポジトリですが、これでリモートリポジトリの準備が整いました。
では、外部からの接続テストを行います。任意のサーバ、もしくはローカルから以下を実施してください。
# git clone ssh://git@[yourdomain]/var/lib/git/public/sample.git
Initialized empty Git repository in /home/git/samplegit/sample/.git/
git@[yourdomain]'s password:
warning: You appear to have cloned an empty repository.
外部からのcloneに成功です。こちらで、接続はOKですね。
次にJenkinsのインストールです。以下のコマンドにてインストールをします。
wget -O /etc/yum.repos.d/jenkins.repo http://pkg.jenkins-ci.org/redhat/jenkins.repo
rpm --import http://pkg.jenkins-ci.org/redhat/jenkins-ci.org.key
yum install jenkins
これでインストールは終了です。
その後は、http://[yourdomain]:8080 にてjenkinsのTOP画面にアクセスが可能です。
これでもOKですが、ポート番号をURLに表示したくないので、Apacheのapache/mod_proxyを使って、
http://[yourdomain]/jenkins にてアクセスできるように変更をします。
ApacheをProxyとしておくことで、Jenkinsが別サーバへ移動になったとしても、URLを変更せずに対応が可能になります。
/etc/httpd/conf.d/jenkins.confを新規作成し、以下を記述します。
<Location "/jenkins">
  ProxyPass http://[yourdomain]:8080/jenkins
   ProxyPassReverse http://[yourdomain]:8080/jenkins
</Location>
また、Jenkinsの設定ファイルへの追加をします。
#vim /etc/sysconfig/jenkins
JENKINS_ARGS="--prefix=/jenkins"
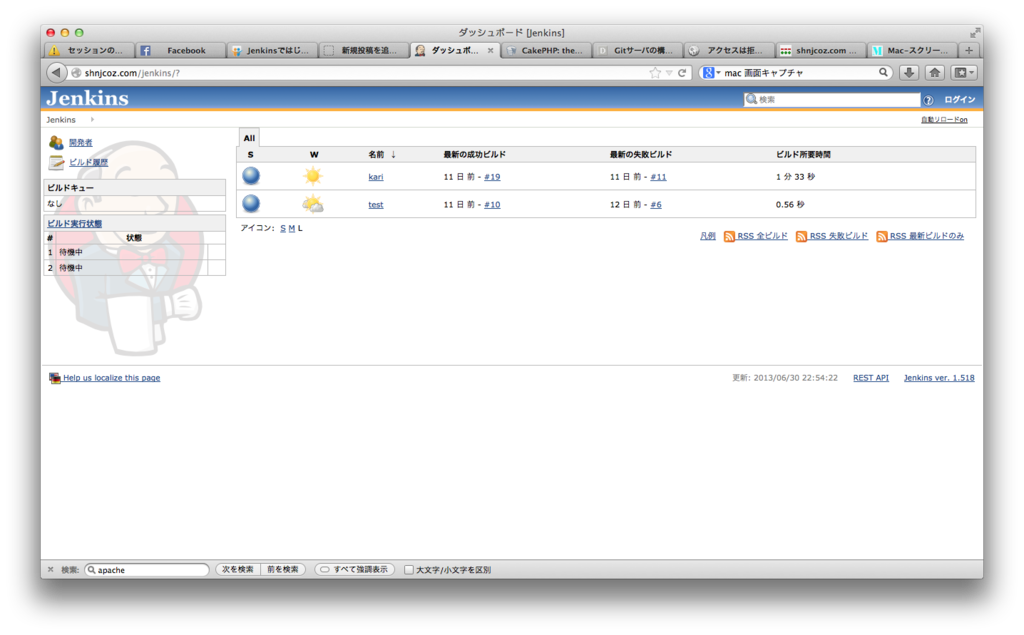
http://[yourdoamin]/jenkins/ でアクセスが可能になりました。こんなイメージです。

さて、長くなりましたが、こちらでGit、Jenkinsの環境が整いました。
この環境を使って、継続インテグレーションを実践していきます。