中途三年目、堀越です。
つい先日、仲良くさせていただいているエンジニアのコミュニティで箱根へ2泊3日の開発合宿へ行ってきました。
何した?
プライベートで仲良くさせていただいている外部のエンジニア3人でチームを組み、 Slack の Bot を開発しました。
Webサーバーが必要でしたので、わたしは主にインフラを担当しました。具体的なミッションは下記です。
- Webサーバーの実行環境構築を Heroku に構築する
- デプロイ環境を整備する
今回の内容
ということでやったことをアウトプットしようかなという内容です。Heroku が公開している node のサンプルアプリケーションを題材にWebアプリケーション構築を目指します。
Herokuアカウント作成
Heroku を使うのでアカウント作成とログインを行います。
アカウント作成
ご自身のアカウントを作成します。
CLIツールインストール
コマンドラインから Heroku をオペレーションするための準備をします。
# コマンドラインツールのインストール
$ brew install heroku/brew/heroku

# ブラウザベージが表示されるのでログインします。
$ heroku login
サンプルアプリケーションの準備
Forkしておく
Docker で動かしたい都合で既存のファイルをいじったり、設定ファイルを追加したりするので Fork しておきましょう。
Fork したリポジトリを git clone する
# git clone
$ git clone <forked repository path>

# ローカルリポジトリへ移動
$ cd node-js-getting-started/
Dockerで動かすための作業
Dockerで動かすために設定ファイルを追加します。ファイルを追加したらコミットするのを忘れずに。
Dockerfile追加
ルートディレクトリに Dockerfile を配置します。下記のような内容です。
FROM node:11.7.0-slim

WORKDIR /app

COPY . /app

RUN npm i

CMD npm start
.gitignore 修正
あまり本質ではないですが今回題材にしているサンプルリポジトリでは、.gitignore に Dockerfile が指定されています。
ビルドするのに Dockerfile が必要になるのでコメントアウトして git で管理できるようにします。
# Node build artifacts
node_modules
npm-debug.log

# Local development
*.env
*.dev
.DS_Store

# Docker
#Dockerfile ← コメントアウト
docker-compose.yml
heroku.yml 追加
アプリケーションを定義するためマニフェストファイル、heroku.yml を追加して、Docker で動作できるように設定を加えていきます。
build:
  docker:
    web: Dockerfile
デプロイ
コマンドラインを経由したデプロイと、Heroku ボタンを経由したデプロイの2パターン紹介します。
コマンドラインからデプロイ
Heroku にアプリケーションの Git リポジトリを作成
$ heroku create <app name>
Stack Version を指定
アプリケーションを動作させる環境に Stack という概念があります。
今回は、Docker を動かすので container を指定します。
$ heroku stack:set container
2019/02 現在のデフォルトでは、 Heroku-18 となっており、上記のコマンドを実行しないと Docker アプリケーションが起動しないので注意してください。
git push してデプロイ
Heroku のリモートリポジトリに git push してデプロイします。
$ git push heroku master

# --- 以下、ビルド実行ログ ---

Enumerating objects: 504, done.
Counting objects: 100% (504/504), done.
Delta compression using up to 4 threads
Compressing objects: 100% (378/378), done.
Writing objects: 100% (504/504), 231.97 KiB | 46.39 MiB/s, done.
Total 504 (delta 94), reused 494 (delta 90)
remote: Compressing source files... done.
remote: Building source:
remote: === Fetching app code
remote:
remote: === Building web (Dockerfile)
remote: Sending build context to Docker daemon  32.77kB
remote: Step 1/5 : FROM node:11.7.0-slim
remote: 11.7.0-slim: Pulling from library/node
remote: 5e6ec7f28fb7: Pulling fs layer
remote: fe40c2f302db: Pulling fs layer
remote: f5096550aaa8: Pulling fs layer
remote: 4971d26c1d33: Pulling fs layer
remote: 4971d26c1d33: Waiting
remote: fe40c2f302db: Verifying Checksum
remote: fe40c2f302db: Download complete
remote: 5e6ec7f28fb7: Verifying Checksum
remote: 5e6ec7f28fb7: Download complete
remote: f5096550aaa8: Verifying Checksum
remote: f5096550aaa8: Download complete
remote: 4971d26c1d33: Verifying Checksum
remote: 4971d26c1d33: Download complete
remote: 5e6ec7f28fb7: Pull complete
remote: fe40c2f302db: Pull complete
remote: f5096550aaa8: Pull complete
remote: 4971d26c1d33: Pull complete
remote: Digest: sha256:b02bda30d271f7e2f7f3e357c635ea5d562a1ac5de890c5a036feaddb438f878
remote: Status: Downloaded newer image for node:11.7.0-slim
remote:  ---> 4e9d08db7f8f
remote: Step 2/5 : WORKDIR /app
remote:  ---> Running in 2c940d28a417
remote: Removing intermediate container 2c940d28a417
remote:  ---> 63a3817470a6
remote: Step 3/5 : COPY . /app
remote:  ---> d39c5c0251b5
remote: Step 4/5 : RUN npm i
remote:  ---> Running in 98543a3b9752
remote: npm notice created a lockfile as package-lock.json. You should commit this file.
remote: added 124 packages from 99 contributors and audited 233 packages in 2.537s
remote: found 0 vulnerabilities
remote:
remote: Removing intermediate container 98543a3b9752
remote:  ---> a50a4ff39c4e
remote: Step 5/5 : CMD npm start
remote:  ---> Running in 6279dadf558d
remote: Removing intermediate container 6279dadf558d
remote:  ---> 3b34f3c24acb
remote: Successfully built 3b34f3c24acb
remote: Successfully tagged c86a1017d69d1a3d9dbbe0f0f2cc77114192cb12:latest
remote:
remote: === Pushing web (Dockerfile)
remote: Tagged image "c86a1017d69d1a3d9dbbe0f0f2cc77114192cb12" as "registry.heroku.com/<app name>/web"
remote: The push refers to repository [registry.heroku.com/<app name>/web]
remote: d294fac76bb2: Preparing
remote: 3b436f579218: Preparing
remote: f726068b7f00: Preparing
remote: 6267213cb0d2: Preparing
remote: 20abef4e545f: Preparing
remote: f91d0068e5fd: Preparing
remote: 3c816b4ead84: Preparing
remote: f91d0068e5fd: Waiting
remote: 3c816b4ead84: Waiting
remote: f726068b7f00: Pushed
remote: 6267213cb0d2: Pushed
remote: 3b436f579218: Pushed
remote: d294fac76bb2: Pushed
remote: f91d0068e5fd: Pushed
remote: 20abef4e545f: Pushed
remote: 3c816b4ead84: Pushed
remote: latest: digest: sha256:3fe198faa8aebf43c650dca954af583e9e2d732fbfff36923615dbc04c168c47 size: 1785
remote:
remote: Verifying deploy... done.
To https://git.heroku.com/<app name>.git
 * [new branch]      master -> master
docker build コマンドが実行されているらしきログが出力されているのが確認できます。
確認
$ heroku open
ブラウザが開きます。
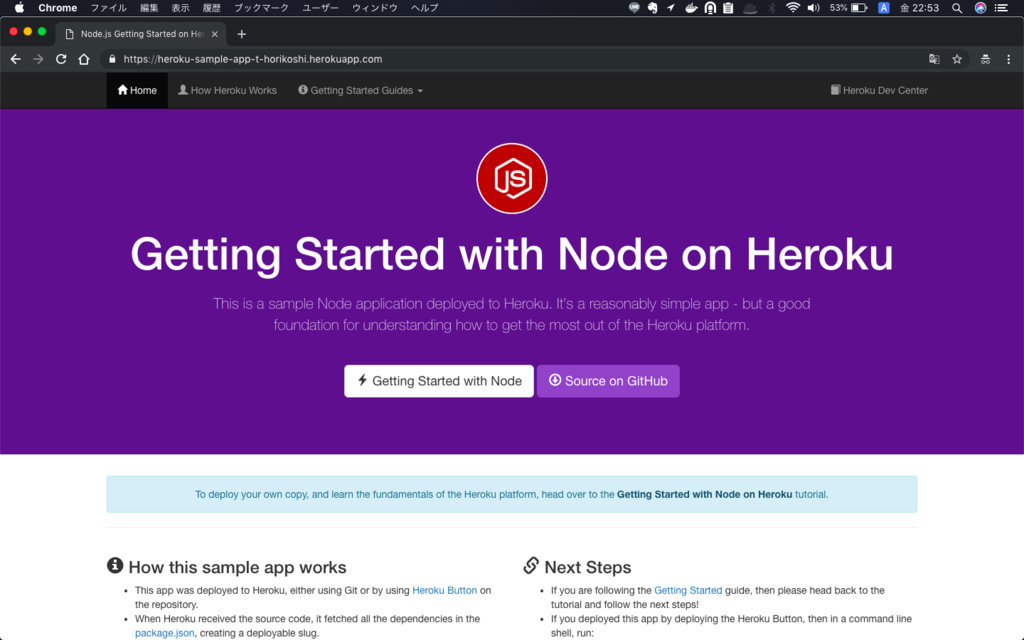
Heroku ボタンからデプロイする
Heroku ボタンを利用するとブラウザから離れることなくデプロイできるようになります。
Heroku ボタンを配置
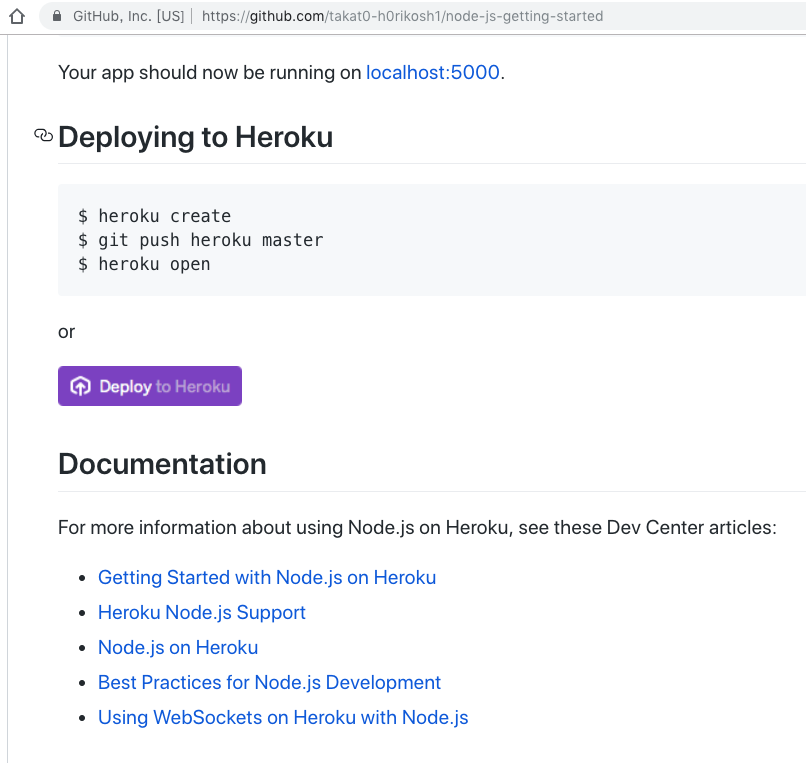
今回のサンプルリポジトリには README.md にすでに配置してあります。下記のような Markdown の記述があります。
[](https://heroku.com/deploy)
HTML の場合、下記のように記述します。
<p align="left">
    <img src="./images/architecture.png" alt="architecture" width="30%" height="30%" />
</p>
app.json に stack の schema
app.json も heroku.yml 同様、アプリケーションのマニフェストファイルです。Heroku ボタンを経由してデプロイする際に参照されます。
今回は Docker アプリケーションをデプロイしたいので、コマンドライン経由のデプロイの手順と同様、 Stack Version に Container を設定します。
app.json のルートの階層に stack の schema を追加します。
{
  "stack": "container"
}
Heroku Button でデプロイ
Heroku ボタンを押す
まず、 Dockerfile, heroku.yml が追加済みかつ、app.json 修正済みのブランチを GitHub 上で選択し、README に表示されている Deploy to Heroku をクリックします。
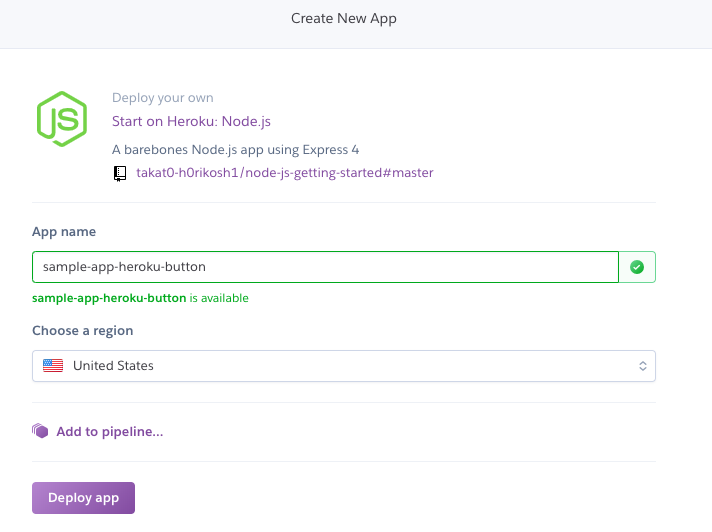
Heroku のページに移動するので、 App name を入力し Deploy app をクリックします。
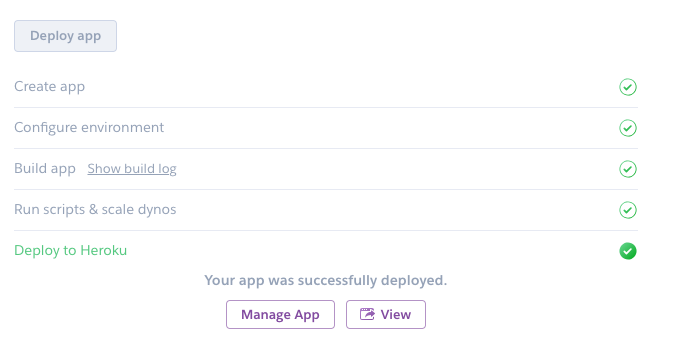
ビルドが走って、無事にデプロイされます。
Manage app を選択すると Overview を確認できます。
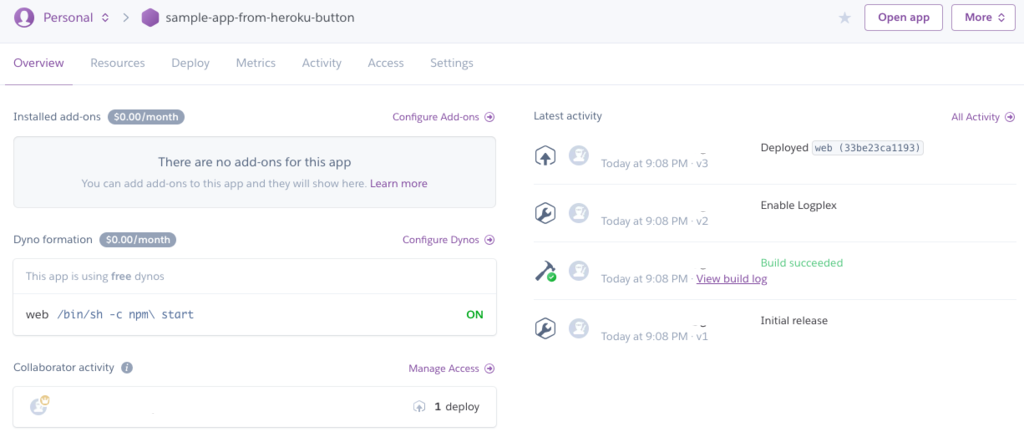
master ブランチに更新が入ったら自動デプロイ
ブラウザページの Deploy のビューから設定することができます。

下記の手順を行います。
Deployment methodにて GitHub と連携App connected to GitHubにて対象のリポジトリを選択Automatic deploysで master ブランチを選択、Enable Automatic Deploysをクリック
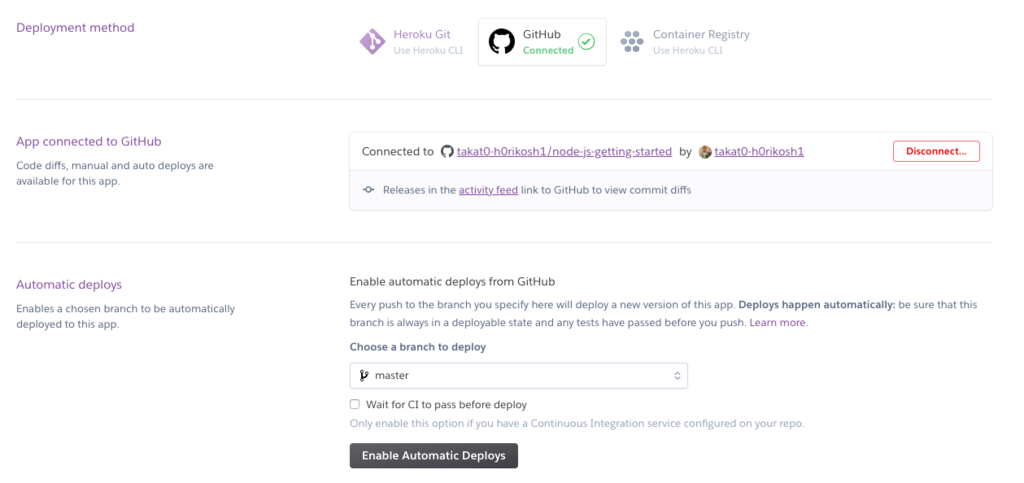
以上で設定は完了です。
難しかったところ・ハマったところ
Heroku は動的にポート番号を生成する
Heroku は動的にポート番号を生成するのでアプリケーションに固定で指定することはできません。このあたりの考慮ができておらずハマった時期がありました。
Stack Version の変更
初回のデプロイ時の stack が heroku-18 になっていて、後から Dockerfile, heroku.yml を追加するだけでは Docker アプリケーションは動いてくれずハマりました。
Docker アプリケーションを動かすためには stack が container である必要があるので当然ですね。今回はコマンドラインから変更しました。
# 次回のデプロイから stack の変更が適応される
$ heroku stack:set container -a <App name>
Stack set. Next release on ⬢ <App name> will use container.
Run git push heroku master to create a new release on ⬢ <App name>.

# 変更無しコミット
$ git commit --allow-empty -m "Upgrading to container"

# デプロイして stack を変更
$ git push heroku master
終わりに
開発合宿の感想ですが、技術研鑽もできて温泉でリフレッシュもできてとても充実していました。弊社でも、開発合宿の企画があるということなので楽しみにしています。